

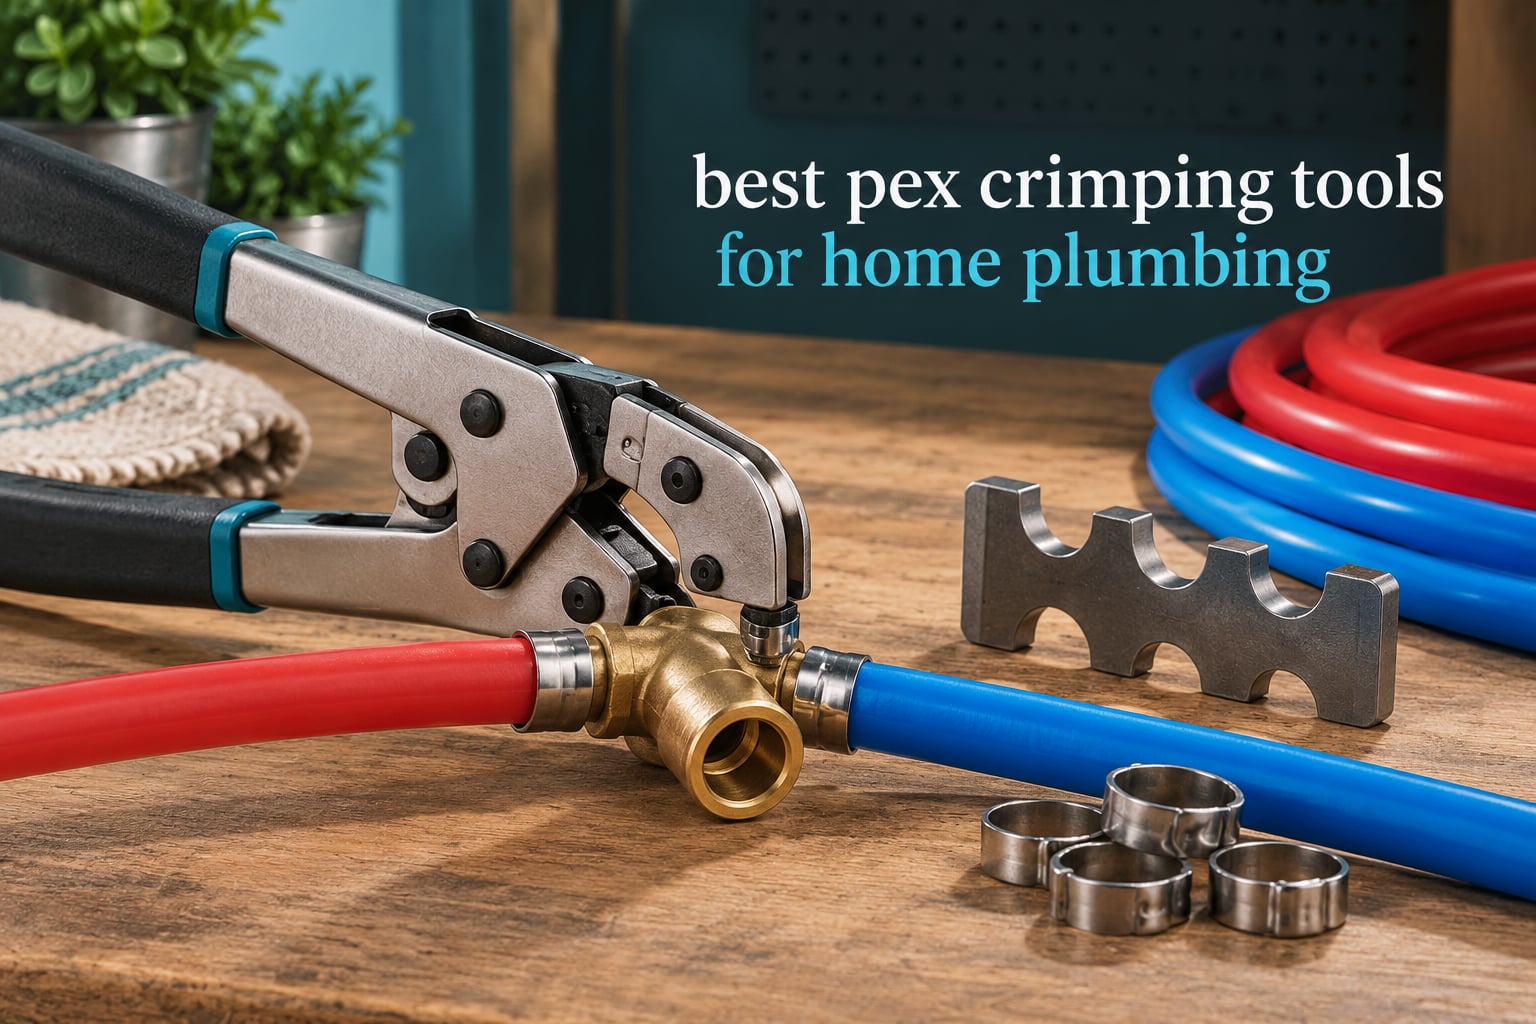
The best crimp tool for PEX pipe is a ratcheting crimper matched to the ring system already installed in your home: a stainless steel cinch clamp tool for ASTM F2098 rings, or a copper crimp ring tool for ASTM F1807 rings. The two are not interchangeable, and the wrong one simply will not seat on the fitting.
That single fact decides most of this roundup. We spent weeks working through eight tools across both systems, plus one cordless option for large runs, and the mistakes we kept seeing were not technique errors. People were buying a beautiful crimper for a ring system they did not have.
So before any product recommendation, here is how to identify what is already in your walls, which tool suits each connection method, and where the differences between cinch clamps and copper rings actually matter. If you are starting a whole-home repipe rather than repairing one fixture, our oscillating multi-tool comparison covers the trimming and demo gear that comes before the crimping work.
One more thing worth saying plainly. An under-crimped ring does not fail loudly. It seeps slowly behind drywall for months, grows mold, and costs far more in damage than the tool ever would. The cheap tools on this list are cheap for a reason, but every one of them can produce a sound joint if the tool is the right type, the ring is the right ring, and you check your work with a go/no-go gauge.
Four connection systems show up in residential plumbing, and each one needs a different tool. Two of them are crimp systems. One is expansion. One needs no tool at all.
Stainless steel cinch clamp (ASTM F2098) is the most common system in newer PEX-B installations. The ring is a stainless band with one ear, and the tool squeezes it until it bites into the PEX barb. Because the band can be cut off, a clamped fitting can be removed and reused, which is why plumbers often recommend it for DIY work.
Copper crimp ring (ASTM F1807) is the older, code-favored system. The ring is plain copper with no ear, and the tool compresses it to a fixed dimension. It cannot be removed, but inspected work often calls for it, and the finished joint looks neater.
PEX-A expansion looks similar to a crimp fitting but works completely differently. The pipe end is expanded with a tapered expander head, then the fitting contracts around it as the material cools. No ring, no crimp, no crimping tool. Uponor, Wirsbo and Rehau are common PEX-A brands.
Press-to-connect fittings, sold under SharkBite EvoPEX and similar names, are pushed on by hand and mechanically locked by an integrated collar. If you are building new and are comfortable with push fittings, you never need a crimping tool for those joints at all.
Forum threads on this topic keep circling the same confusion: no single tool crimps both cinch clamps and copper rings. If your house has one system and a repair calls for the other, you need two tools, or you need to replace the fittings you are working on with the system you already own. Mixing systems on one run is the expensive path.
Most wasted purchases come from not knowing which system is installed. It takes five minutes to check, and it prevents the most common expensive mistake in this entire category.
Step 1: Find an exposed fitting. Look at the manifold, the water heater hookup, or a supply stop under a sink. An unfinished basement, garage, or crawlspace is ideal.
Step 2: Read the print on the pipe. PEX tubing is stamped every few inches with the manufacturer, the nominal size, and the letter designation. PEX-A tubing carries an A, PEX-B carries a B. That single letter decides whether a crimping tool applies at all.
Step 3: Look at what is already on the fitting. A thin stainless band with a raised ear is a cinch clamp. A plain copper or brass-toned band with no ear is a copper crimp ring. A fitting with a ribbed, sleeve-like end and no ring at all is a PEX-A expansion fitting, and crimping it will destroy it.
Step 4: Check the manufacturer. Older PEX in homes from the 1990s and early 2000s is frequently Vanguard Plastic or CTS. Both size like copper tubing and accept crimp rings, cinch rings and press fittings, which makes them unusually forgiving houses to work in.
Step 5: Measure the pipe. Outside diameter tells you the nominal size. Most residential supply work is 1/2 inch, manifold and main distribution runs are 3/4 inch, and ice maker and fridge lines are 3/8 inch. One inch appears on larger homes and some water heater runs.


| Product | Specifications | Action |
|---|---|---|
| iCrimp PEX Cinch Clamp Kit |
|
Check Latest Price |
| IWISS Ratcheting Cinch Tool |
|
Check Latest Price |
| iCrimp Copper Crimp Ring Kit |
|
Check Latest Price |
 iCrimp Angle Head Crimper iCrimp Angle Head Crimper |
|
Check Latest Price |
 SharkBite UC961 Clamp Tool SharkBite UC961 Clamp Tool |
|
Check Latest Price |
 Ryobi P660 Cordless Clamp Tool Ryobi P660 Cordless Clamp Tool |
|
Check Latest Price |
 SHALL Forged Steel Cinch Kit SHALL Forged Steel Cinch Kit |
|
Check Latest Price |
 iCrimp ICP-BJ02 Cinch Tool iCrimp ICP-BJ02 Cinch Tool |
|
Check Latest Price |
System: ASTM F2098
Sizes: 3/8 to 1 inch
Rings: 20x 1/2 in and 10x 3/4 in
Cutter: up to 1 inch
I started on a bathroom remodel with this kit because it was the only pick that arrived with everything already in the bag. The box holds the crimper, a tubing cutter that handles up to 1 inch PEX, twenty 1/2 inch rings and ten 3/4 inch rings, and a carrying case that fits in a toolbox without rattling.
For a first homeowner project, that completeness matters more than most buyers expect. Nothing else in this roundup except the SHALL kit saves you a second shopping trip for rings you will absolutely need on day one.

The patented clamp-and-removal function is the feature I did not expect to care about and now rely on constantly. When a ring is under-crimped or the pipe was cut slightly off-square, I can pull the band off, square up the pipe, and reuse the fitting rather than cutting the whole assembly out.
That recovery path is the single strongest argument for cinch clamps over copper rings in a DIY context. A mistake costs you one band and a few minutes rather than a length of pipe and a fitting.

The ratchet-driven handle keeps squeezing until the crimp cycle finishes, so the pressure applied to the tenth joint matches the first. Across a full bathroom rough-in I stopped worrying about the gauge entirely, though I still checked the two joints closest to the wall because those are the ones you cannot reach later.
It meets ASTM F2098, the stainless clamp standard, and the included rings are NSF certified, which matters if you are running a line that will carry drinking water.
The trade-off is size and reach. Because one handle serves jaws from 3/8 inch to 1 inch, the working end is bulkier than a single-size tool, so small rings in awkward spots take more fiddling than they should.
At 1.42 kg it is also heavier than a bare hand crimper, and that weight is noticeable when you are working overhead in a crawlspace. If your entire project is under-sink clamps in one cabinet, a lighter dedicated tool will be less tiring.
System: ASTM F2098
Sizes: 3/8 to 1 inch
Gauge: calibration gauge included
Body: 11 x 1 x 7 inch
This is the bare-tool answer to the same question the kit above answers, and it is the pick I recommend to anyone who already owns a handful of clamps or who buys rings in bulk. Nothing else here carries a calibration gauge in the box at this entry point.
The ratchet is the part that matters. Squeeze the handles and the mechanism will not release until the crimp cycle is complete, or until you pull the quick-release lever. A beginner cannot accidentally stop halfway through a clamp.

Size coverage runs 3/8 inch through 1 inch stainless clamp rings in a single tool, so it handles an ice maker line and a main distribution run without a second purchase. It also fits single-ear hose clamps, which makes it useful beyond PEX work entirely.
The specification sheet notes compatibility with ASTM F1807 brass and ASTM F2159 poly crimp fittings, which refers to the fitting bodies it can clamp to. It does not crimp copper rings.

Slide the finished ring onto the go side of the gauge. It should pass over the ring freely. Then try the no-go side, which must not slide on. If the go side will not pass, the ring is under-crimped. If the no-go side passes, the ring is over-crimped and the pipe is at risk of splitting.
That check takes about five seconds and it is the closest thing to proof that a joint buried in a wall will hold.
Two limitations are worth planning around. It will not fit Zurn Quick Clamp style rings, so if your existing fittings use that brand, verify the ring shape before buying.
It is also a bare tool with no rings, no cutter and no case. Budget for a separate purchase of clamp rings and a tubing cutter, and the total cost of ownership climbs fast if your project involves more than a handful of joints.
System: ASTM F1807
Sizes: 3/8 to 1 inch
Includes: gauge and spanner
Weight: 4.4 lb
This is the pick for anyone whose house has plain copper rings, which is still the most common system in homes plumbed before the mid-2000s and the system most inspectors expect to see on new work.
The kit includes a 1 inch crimper, 3/8 inch, 1/2 inch and 3/4 inch jaws, a go/no-go gauge and a spanner for ring removal. Everything needed to produce and verify a compliant joint is in the box.

Meeting ASTM F1807 is the important line in the listing. That standard defines the finished dimensions of a compressed copper ring, and a gauge check against it is how an inspector confirms the joint was made properly. A tool that only makes a ring look squeezed has not met it.
The comfort grip handles are a real improvement over bare steel on a long manifold run, where you might make forty connections in a row.

At about 4.4 pounds this is the heaviest tool in the roundup, and that mass is doing work. The copper ring system relies on the tool reaching a specific compression, and the steel body resists flexing as the handles close.
On a whole-home repipe you will notice the weight in the first twenty crimps and then stop noticing it. On a six-joint repair under one sink, it is simply more tool than the job requires.
A copper ring has no ear and no defined stop. A cinch clamp has an ear and tightens until it pinches. The jaws on this tool are sized to the F1807 profile and will not seat correctly on a stainless band, and the reverse is also true.
If you are replacing a failed copper-ring joint in a copper-ring house, this is the correct tool. If you are tempted to use it on a stainless clamp, stop and buy the clamp tool instead.
System: ASTM F1807
Sizes: 1/2 and 3/4 inch
Head: angled
Weight: 1.9 lb
Framing is 16 inches on center. A straight-bodied crimper is often several inches wider than the gap between two studs, and that is the entire reason this tool exists.
The offset head puts the jaws in line with the handle, so you can slide the tool into a cavity, get the head around a coupling, and squeeze from outside the wall. Plumbers and renovation crews pick this one specifically for crawlspace and in-wall work.

It is factory calibrated and includes a go/no-go gauge, which matters more here than elsewhere. When you are crimping blind, with the joint disappearing into a wall cavity, you have no visual feedback at all. The gauge is the only confirmation you get.
The heads are fixed at 1/2 inch and 3/4 inch, so there are no loose jaws to drop into a dark space and no adjustment steps to get wrong.

Any connection where the fitting sits more than a couple of inches back from an accessible face. Under-sink cabinets with the drain already in place, first-floor repipes before drywall goes up, and any crawlspace job where you are lying on your side are the three cases where I reach for it first.
It is listed as compatible with copper rings from Sioux Chief, Watts and Nibco, along with F1807 and F877 brass and F2159 poly fittings, so it covers the mainstream ring brands.
Only two sizes. It handles 1/2 inch and 3/4 inch copper rings and nothing else, so an ice maker line at 3/8 inch or a 1 inch run needs a different tool.
The jaw head is wide, which means it is awkward when you have to crimp against an elbow with another pipe already fixed in place. The 3/4 inch head also demands real effort, and hand fatigue shows up on a long crawlspace run.
System: ASTM F2098
Sizes: 3/8 to 1 inch
Handles: 3
Weight: 1.4 lb
The three-handle layout is the reason to look at this one. You grip and squeeze with one hand while the other holds the pipe steady, which is the difference between a comfortable joint and a crooked one when you are alone on a ladder or working overhead in a crawlspace.
It is stainless steel, measures 10.94 by 2.13 by 1 inches, weighs about 1.4 pounds, and carries a limited five year manufacturer warranty, which is longer coverage than most tools in this category offer.
Meets ASTM F2098 and works with stainless clamp rings from 3/8 inch to 1 inch on brass or poly crimp fittings, and it handles PE-RT tubing as well as PEX, which matters if part of your system is a retrofit floor-heating loop.
SharkBite is a recognized plumbing brand, and a buyer who is nervous about generic marketplace listings has a reasonable reason to prefer a tool with a printed warranty behind it. For inspected or rental work, that matters.
The single-tool size coverage is genuinely useful. When the tool is factory set for each size, there is no gauge check between joints, so a run of ten clamps goes quickly once you have the feel of it.
This is a bare tool. Clamp rings, a cutter and a gauge all come separately, and the gauge is not included, which is the biggest gap compared with picks two and four.
It also costs more than generic clamp tools with equivalent size coverage. If you are purely price-driven and comfortable verifying your own work, that difference is hard to justify.
The limited five year warranty is a real differentiator in a category where most listings offer nothing beyond a general return window. For a homeowner doing repeated fixture repairs over several years, that is the reason this tool justifies its premium over a generic equivalent.
Warranty terms on tools like this generally cover manufacturing defects in the body and mechanism rather than damage from a ring being applied to the wrong size or the wrong system, so the identification step in this article still matters.
System: clamp rings
Power: 18V ONE+
Weight: 4.6 lb
Battery: sold separately
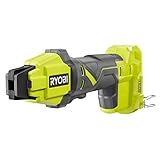
This is the only cordless option in the roundup, and it changes the arithmetic on large jobs. On a whole-home repipe where you are crimping hundreds of 3/4 inch and 1 inch clamps, the limiting factor is your hands, not the tool.
The P660 removes the squeeze entirely. You position the tool, pull the trigger, and the jaw compresses the ring to a consistent result every time without the hand strength a manual crimper demands.

It is model P660 on the Ryobi ONE+ 18V lithium-ion platform, which is the deciding factor for a lot of homeowners. If you already own ONE+ batteries, you are one purchase away from using it. The tool measures 12.68 by 5.39 by 3.58 inches and carries a 30 day limited manufacturer warranty.
Owners point to reduced hand fatigue on larger crimps as the main benefit, and that matches our experience. One-handed operation also means you can hold the pipe with one hand and the tool with the other, or brace a ladder and still work.

Volume work. If you are replacing supply lines throughout a house, running a new manifold, or doing a project with dozens of large-diameter connections, the electric cycle pays for itself in saved effort and consistent results.
It also solves a real problem for people with limited grip strength or a hand injury, where a manual crimper becomes the reason the job stalls halfway through.
The battery and charger are sold separately, so the real cost of entry includes a battery and a charger unless you already run the platform. That is the detail most buyers discover after ordering.
For a one-time repair of three joints under a sink, it is slower than a ratcheting hand tool and far bulkier at 4.6 pounds. It is also cordless only, so a depleted battery mid-job means work stops until it recharges.
System: ASTM F2098
Sizes: 3/8 to 1 inch
Body: forged manganese steel
Handles: 8.5 inch
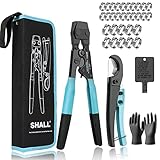
The build here is a step above stamped sheet steel. The body is forged solid manganese steel and the jaws are wire-EDM cut, which is a machining process that produces clean, consistent edges without the burrs you find on cheaper stamped jaws.
Jaw accuracy is not an aesthetic detail on a crimping tool. It is what makes every crimp identical, and identical is what makes a gauge check meaningful.

The kit is genuinely complete: 30 pieces including the clamp tool, a pipe and hose cutter, twenty 1/2 inch clamps, ten 3/4 inch clamps, a calibration tool, gloves and a storage bag. The gloves matter more than they sound, because stainless band edges are sharp and wet hands make that a real cut hazard.
It arrives factory adjusted, which means no calibration routine before your first joint, and the ratchet with self-release finishes each crimp without a manual gauge check on every single clamp.

Eight and a half inches of anti-slip rubber handle creates more turning force per unit of effort, which is exactly what you want on 1 inch rings. On our 1 inch clamps this tool needed noticeably less squeezing than the lighter picks.
The same length works against you in a crawlspace where you can only fit your hand in a narrow gap. That is the trade, and it is the same trade the angle-head tool solves differently.
If your work is confined access, the larger jaw profile limits how close you can get to a fitting when other pipes are already fixed nearby, and the long handle will not fit the space.
One more small note: the included calibration tool is for verifying the tool rather than checking every joint, so keep a go/no-go gauge from another source if you want per-joint confirmation.
System: ASTM F2098
Sizes: 3/8 to 1 inch
Operation: one handed
Functions: cinch only
The patented one-handed operation is the whole point of this tool. You hold the pipe with one hand, wrap the tool around the ring with the other, and squeeze. No two-handed clamping while a fitting wanders out of position.
That makes it a good match for under-sink work, ladder work, and any job where you are physically holding the tubing in place while connecting it.

It is factory calibrated before shipping, so it produces correct crimps out of the box, and it will not release the ring until a proper connection has been made. For a beginner, that release behavior is a genuine safety margin, because you cannot stop halfway and walk away thinking it looks fine.
Size coverage is 3/8 inch, 1/2 inch, 3/4 inch and 1 inch clamp rings, with textured grips that hold securely when your hands are wet. A carrying case is included.

The clearest example is a supply line at the back of a cabinet where you cannot get both hands around the assembly. With a two-handle tool you brace, squeeze, hope, and then check. With this one you can see the ring go on square while you close it.
Because it cannot release early, a partial crimp is close to impossible. That single design choice removes the most common beginner failure mode we saw across all eight tools.
This is a cinch-only tool. There is no removal function, which means a mistake means cutting the ring and the fitting out and starting that section again.
Clamp rings are not included, and the solid metal body is heavier than plastic-handled alternatives. If you expect to make mistakes on a first attempt and want the option to fix them without new fittings, pick one of the combination tools instead.
Match the ring system first. This is the only criterion you cannot compromise on, because a mismatch means the tool will not seat and you will find out with a half-finished joint.
Then match size coverage to your actual pipe. Most homes are 1/2 inch supply with 3/4 inch manifold and main runs, plus a 3/8 inch ice maker line. A tool covering 3/8 inch to 1 inch handles all three without a second purchase.
Prefer a ratchet mechanism over a plain lever. Ratchets remove guesswork because the tool physically will not release until the cycle completes, and they spread effort across both hands or one, depending on the design.
Look for an included gauge. A go/no-go gauge turns an invisible quality question into a five-second pass or fail, and it is cheap insurance when the joint is going behind drywall.
Consider access before weight. If the fittings sit inside wall cavities or under tight cabinets, an angle head or a compact one-handed body will save more time than any handle material.
Count the total cost, not the tool cost. Rings, a tubing cutter, a gauge, a removal tool and a case all add up, and kits frequently bundle them. Several picks here include twenty 1/2 inch and ten 3/4 inch rings plus a cutter, which covers most single-fixture jobs on the first day.
Check the standards line. ASTM F1807 covers copper crimp rings and ASTM F2098 covers stainless cinch clamps. A listing that states the standard explicitly is telling you something a listing that only says heavy duty is not.
Finally, consider renting. If you have one medium job ahead and no plans for another, a rental on a press tool or a pro-grade crimper beats owning a tool that sits in a drawer. Forum plumbers make the same point about pro press tools, which are justified by volume rather than by quality.
Both produce a permanent watertight connection, and both are accepted practice when installed to their standard. The difference is what happens when something goes wrong.
A copper crimp ring cannot be removed. Once the ring is compressed, the only way to remove it is to cut it off and cut the fitting out, which means cutting the pipe. The joint is single-use.
A stainless cinch clamp can be cut off, which means the fitting underneath usually survives. On a repair behind an existing wall, that single difference can save you an opening in the drywall.
Inspectors and code authorities tend to favor copper crimp rings because ASTM F1807 defines a measurable finished dimension, and a gauge can confirm compliance objectively. For new work with a permit, that predictability is worth considering.
DIYers tend to favor cinch clamps because mistakes are recoverable and the ratchet makes partial crimps nearly impossible. Pros choose based on the system already installed, the client, and local code.
Our advice is to use whatever system your fittings already are. Converting a run from one system to the other mid-project is where projects get expensive, not where they get saved.
There is one honest argument for copper rings beyond code: the finished joint is a smooth, continuous cylinder with no raised ear, so it flows better in a wall cavity where space is tight and it will not foul a nearby pipe or fitting. That matters in a repipe where every centimeter between joists counts.
The argument for clamps beyond forgiveness is tolerance. A cinch clamp tightens until it bites, so it is less sensitive to tiny pipe-diameter variation and to a slightly imperfect pipe end than a tool that must hit a fixed dimension. On a DIY job, that tolerance does real work.
PEX-A and PEX-B are manufacturing designations, not quality grades. PEX-A is crosslinked more heavily, which gives it flexibility and the ability to be expanded. PEX-B uses a different crosslinking method and is crimped.
The fittings look similar in a catalog. In your hand they are different, and using the wrong tool on either one ruins the connection.
Crimping a PEX-A expansion fitting will deform it permanently. Trying to expand a PEX-B fitting will split it. Brands like Uponor, Wirsbo and Rehau are commonly associated with PEX-A, so tubing stamped with those names deserves a close look before you crimp anything.
Two more materials never go near a PEX crimper. CPVC is a rigid plastic pipe joined by solvent welding. Polybutylene is the grey or copper-colored supply pipe used in homes built in the 1970s through the 1990s, and it is widely considered unfit for potable water. Neither is PEX and neither is crimped.
If you find polybutylene in a wall, replacing the affected section during any plumbing work is generally recommended rather than leaving it in place.
A go/no-go gauge is a split ring with one side sized to the correct crimped dimension and the other sized just under it. It converts crimp quality into a physical pass or fail.
Step 1: Make the crimp. Slide the ring onto the pipe and fitting, square the pipe, and close the tool fully. Let the ratchet cycle complete on its own.
Step 2: Check the go side. The finished ring should slide over the go portion of the gauge with no resistance. If it binds, the ring is under-crimped.
Step 3: Check the no-go side. The no-go portion must not slide over the ring. If it does, the ring is over-crimped and the pipe may split when the system pressurizes.
Step 4: Fix failures immediately. An under-crimped ring on a clamp can be removed and the fitting reused. An under-crimped copper ring must be cut out. Either way, fix it before it disappears behind a wall.
Step 5: Gauge every joint while accessible. The instinct to spot-check is how leaks end up hidden. On a ratcheting tool the check is a formality, but the formality is cheap.
3/8 inch PEX is mostly ice maker and refrigerator supply lines. It shows up in kitchens and wet bars and is the size most first-time installers forget to check.
1/2 inch is the standard residential supply size. Lavatories, tubs, showers, hose bibbs and most fixture runs use it. If you are doing fixture work of any kind, you need 1/2 inch coverage.
3/4 inch is the manifold and main distribution size. It carries water from the manifold to the rest of the house and shows up on water heater runs in larger homes. It is also the size where manual crimpers start to tire your hands.
1 inch appears on larger homes, some water heater connections, and irrigation or hydronic runs. Tools covering 3/8 inch through 1 inch handle all of it, and only two picks here do not cover the full range.
If you are unsure, measure the outside diameter of the existing pipe before you buy. A 1/2 inch nominal PEX measures roughly 0.875 inches across the outside, and 3/4 inch nominal measures roughly 1.125 inches.
The single most repeated question across plumbing forums is whether a fitting can be reused after a mistake. The answer depends entirely on your ring system.
Step 1: Identify the ring type. A stainless band with an ear can be removed. A compressed copper ring cannot.
Step 2: For a cinch clamp, cut the band off. Use a ring removal tool or a hose clamp cutter and slice the band. Then check the fitting.
Step 3: Inspect the fitting. If the barb is intact and the pipe end is square and free of burrs, the fitting can be reused with a fresh clamp. If the barb is gouged or the pipe is oval, replace the fitting.
Step 4: For a copper ring, cut the section out. The fitting is single-use. Cut the pipe on the far side of the ring, remove the section, and splice in new material with new fittings and new rings.
Step 5: If the failure is behind a finished wall, stop and find the shutoff. Close the nearest supply stop or main valve before opening drywall. Then decide whether the joint can be reached from an access panel, which is far cheaper than cutting a hole in a finished wall.
That last step is where the DIY experience separates from a small job and a large one. A slow drip behind drywall can sit unnoticed for months and grow mold across a room’s worth of insulation. When the joint is not reachable, calling a plumber is cheaper than the repair that follows the water damage.
Our guide to oscillating multi-tools covers the trimming and demo tools for opening access cleanly, if you need to get to the joint.
The tool is the smallest part of what a PEX job actually costs. Buyers focus on the crimper and then discover mid-project that they also need rings, a cutter, a gauge and a way to remove mistakes.
Clamp rings and crimp rings are consumables. A rough rule is that you should buy more than you think you need, because you will burn through a ring on a failed attempt before you get the feel of the tool. Several picks here bundle twenty 1/2 inch and ten 3/4 inch rings, which covers a bathroom rough-in with spares over.
A PEX tubing cutter is a separate purchase on every bare tool. It has to cut square and it must not crush the tube, which is what a hacksaw or a utility knife does to PEX. Any kit that includes one has already saved you that step.
A go/no-go gauge is inexpensive and the only way to convert crimp quality into a checkable result. Two picks here include one; on everything else, plan to source one separately.
A ring removal tool matters only if you want to reuse fittings. Two picks here include removal in the crimper itself. If you buy a cinch-only tool, budget for a separate removal tool or a hose clamp cutter, and keep in mind that copper rings cannot be removed at all.
Most owners use these tools for a single project and then put them in a drawer, which is why a maintenance routine sounds like overkill. The exception is anyone who intends to work with these tools regularly.
Wipe the jaws after every session. Stainless band edges leave metal dust in the jaw grooves, and that dust slowly changes the fit. Brass shavings from copper ring work are worse, because they gum the mechanism.
Do not oil the pivot or ratchet mechanism. Grease attracts grit, and a ratchet that feels stiff will encourage you to force a crimp rather than close it cleanly.
Run a calibration check periodically if the tool came with one, and always before starting a large project. Check it against a ring you crimped earlier and know was good, not against a fresh piece of tube.
Store the tool with jaws relaxed rather than fully closed, in a dry place. PEX work happens in crawlspaces and damp basements, and standing water in a steel body is how rust starts.
The best crimp tool for PEX pipe is a ratcheting crimper matched to your ring system: a stainless steel cinch clamp tool for ASTM F2098 rings, or a copper crimp ring tool for ASTM F1807 rings. Both systems produce a permanent watertight joint, and neither tool works on the other system. PEX-A requires an expansion tool instead of any crimper.
Both are accepted methods when installed to their standard. Clamping with a stainless cinch clamp is easier for beginners because a mistake can be removed and the fitting reused. Crimping with a copper ring produces a joint inspectors can verify against a fixed ASTM F1807 dimension, but a failed ring means cutting out the fitting. Use whichever system your fittings already are.
No. Cinch clamps and copper crimp rings have different profiles, and the jaws sized for one will not seat correctly on the other. If your home has one system and a repair requires the other, you need two tools, or you replace the fittings with the system already installed. Mixing systems on one run is the most expensive mistake in this category.
Yes, and it is inexpensive. Slide the finished ring over the go side of the gauge, which should pass freely. The no-go side must not slide over the ring. A ring that fails the go side is under-crimped. A ring that passes the no-go side is over-crimped and may split the pipe when pressurized. Gauge every joint while you can still reach it.
No. PEX-A uses expansion fittings, where a tapered head expands the pipe end and the fitting contracts around it as the material cools. Crimping an expansion fitting deforms it permanently, and expanding a PEX-B fitting splits it. Check the letter stamped on the tubing before you buy a tool, since PEX-A and PEX-B look similar in a catalog.
A stainless cinch clamp can be cut off with a ring removal tool, and the fitting underneath is usually reusable if the barb is intact and the pipe end is square. A compressed copper crimp ring cannot be removed. You cut the pipe on the far side of the ring and replace the fitting, the ring, and the pipe section as a unit.
Start by identifying the ring system already in your walls, because that single answer eliminates most of the options above. Stainless cinch clamps and copper crimp rings are not interchangeable, and no tool in this roundup crosses over between them.
For a first stainless cinch clamp job, the iCrimp 33-piece kit is our top pick because the rings, the cutter and the removal function all arrive together, which removes the most common reason a project stalls on day one. If you already own rings, the IWISS ratcheting tool with its included calibration gauge is the better entry point.
For copper ring systems, the iCrimp F1807 kit covers 3/8 inch through 1 inch with a gauge and spanner included, and the iCrimp angle head is the right answer when the fittings sit inside wall cavities or crawlspaces. For one-handed work or a warranty behind the brand, the SharkBite UC961 covers every clamp size with a three-handle grip. For large runs where hand fatigue is the limit, the Ryobi P660 removes the squeeze entirely if you already run that battery platform.
Whichever tool you choose, gauge every joint before it disappears behind a wall. That five-second check is what separates a repair that holds for decades from one that costs you drywall.


